With Veeam Backup & Replication version 10a and later, a VBR plugin has been released allowing for integration with the Veeam Backup for AWS appliance, granting management of certain settings through the VBR console and backup copy job support. Configuring this integration is simple.
Pre-Requisites
- Veeam Backup & Replication version 10a or newer is installed
Appliance Deployment and Configuration
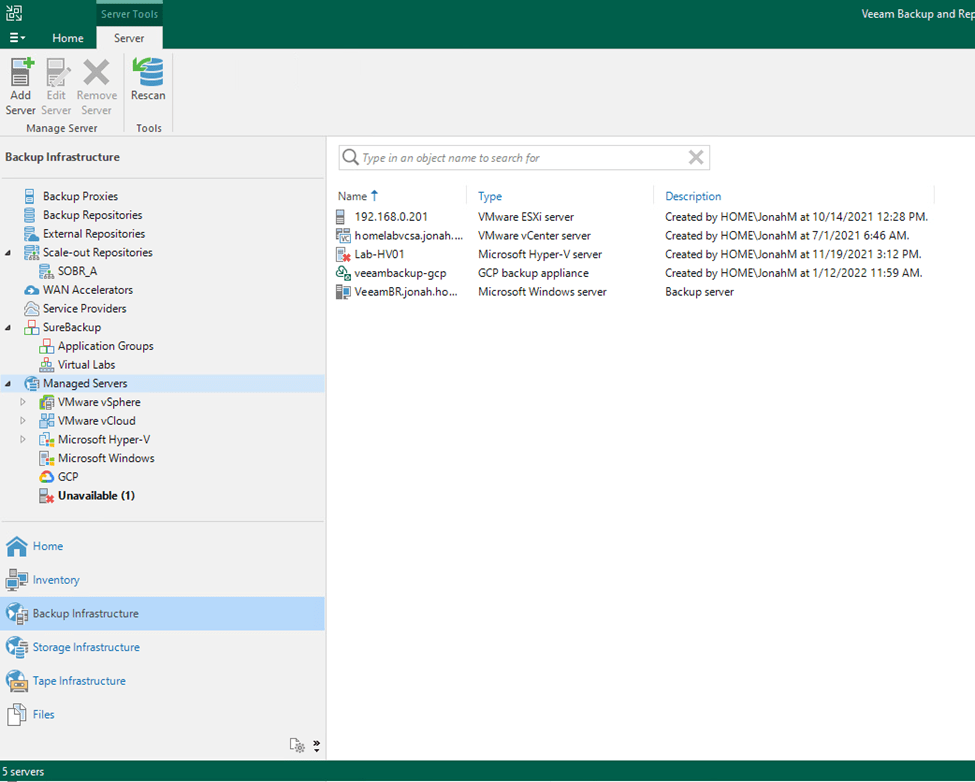
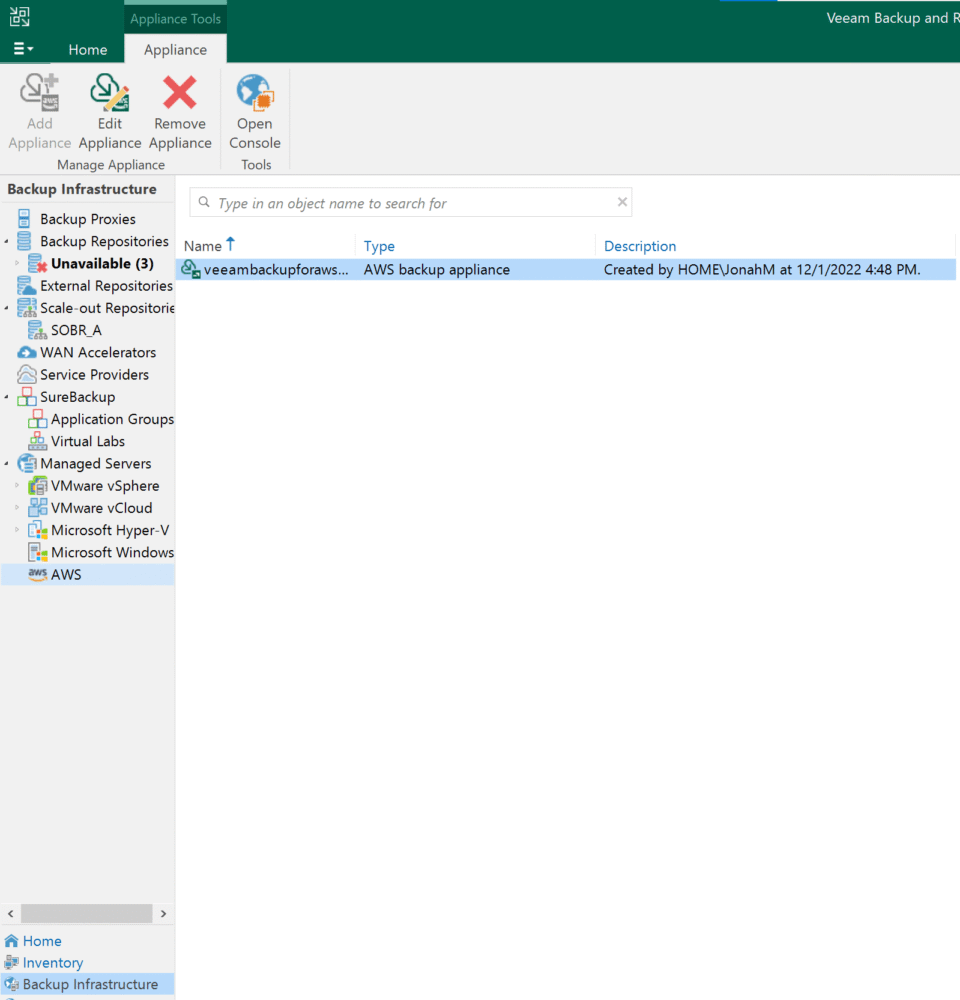
First, let’s begin by launching the Veeam Backup & Replication console and navigating to the Backup Infrastructure view. From here, select Managed Servers from the left-hand menu and click the Add Server button in the top menu.
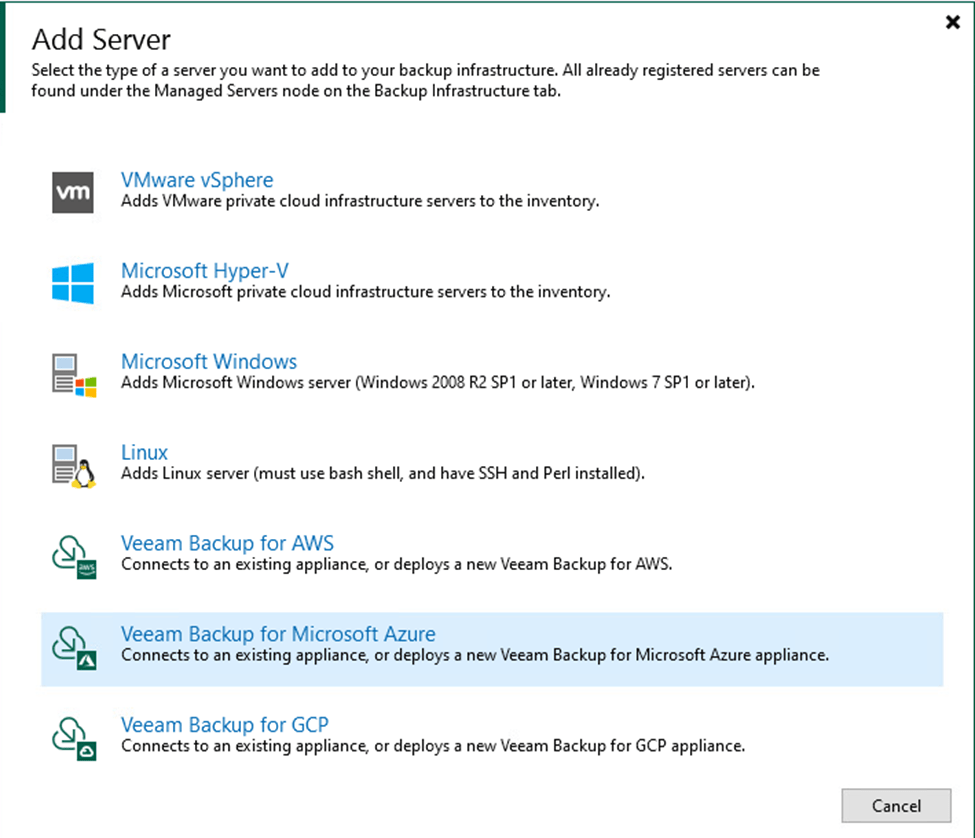
Next, select Veeam Backup for AWS from the available options.
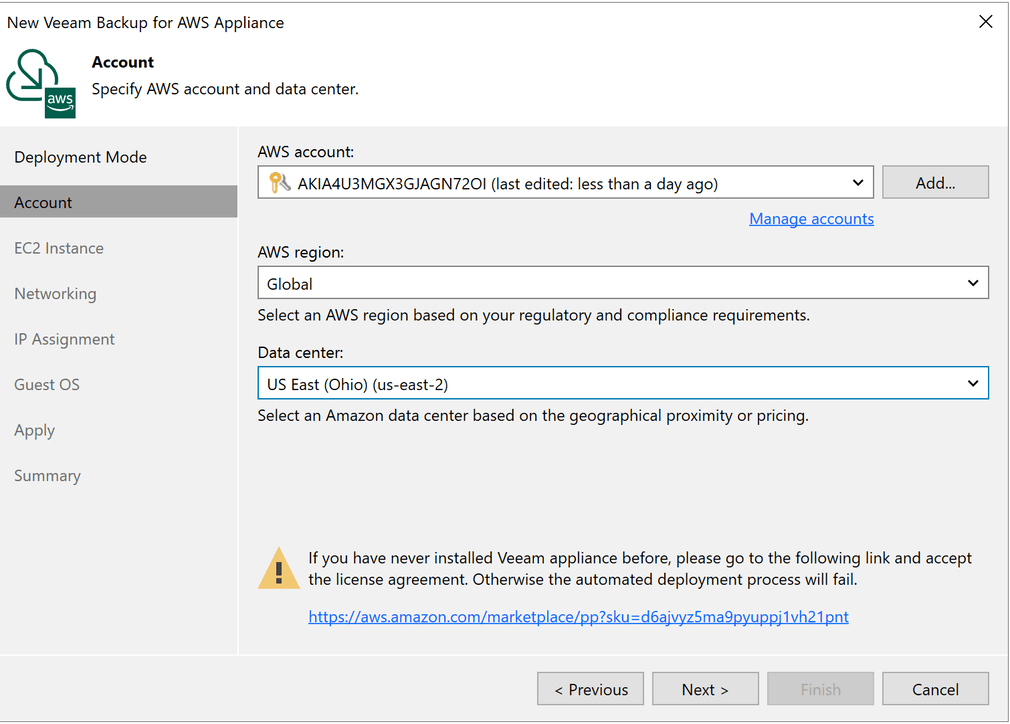
Today, we will be deploying a brand-new backup appliance however, it is also possible to connect to a pre-existing appliance. After selecting the deployment mode, go ahead and add your AWS service account. On this screen, you can either create a new service account (which I have done) or connect to an existing account. Use the Add button to connect to your AWS environment using an access key and secret key, then select the region and data center your workloads are located in. Finally, use the hyperlink to accept the license agreement and proceed to the next screen.
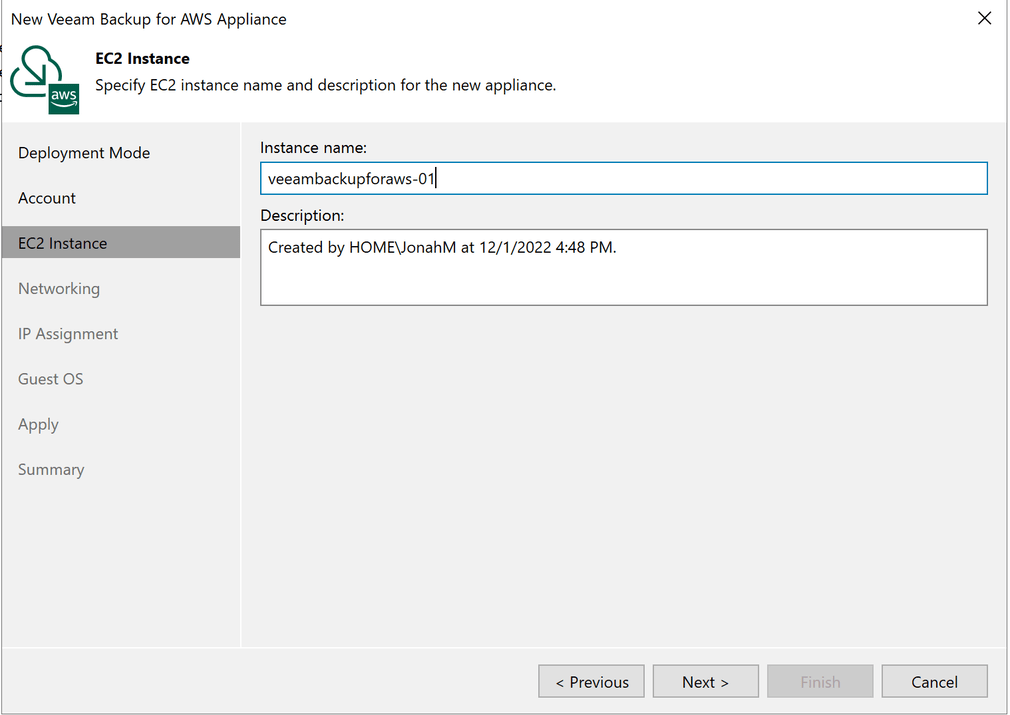
Give the new appliance instance a name and description, then proceed to the next screen.
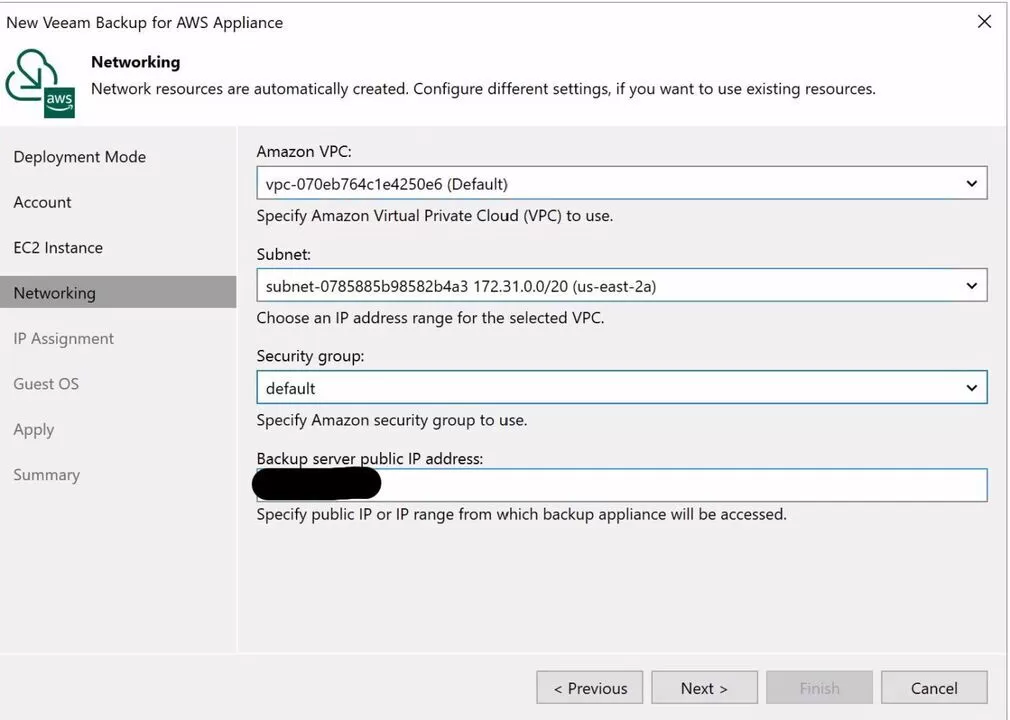
Now network settings are inputted. Here set the VPC, subnet, and network tag. The backup appliance’s public IP address should be pre-populated, but you may need to enter the IP manually.
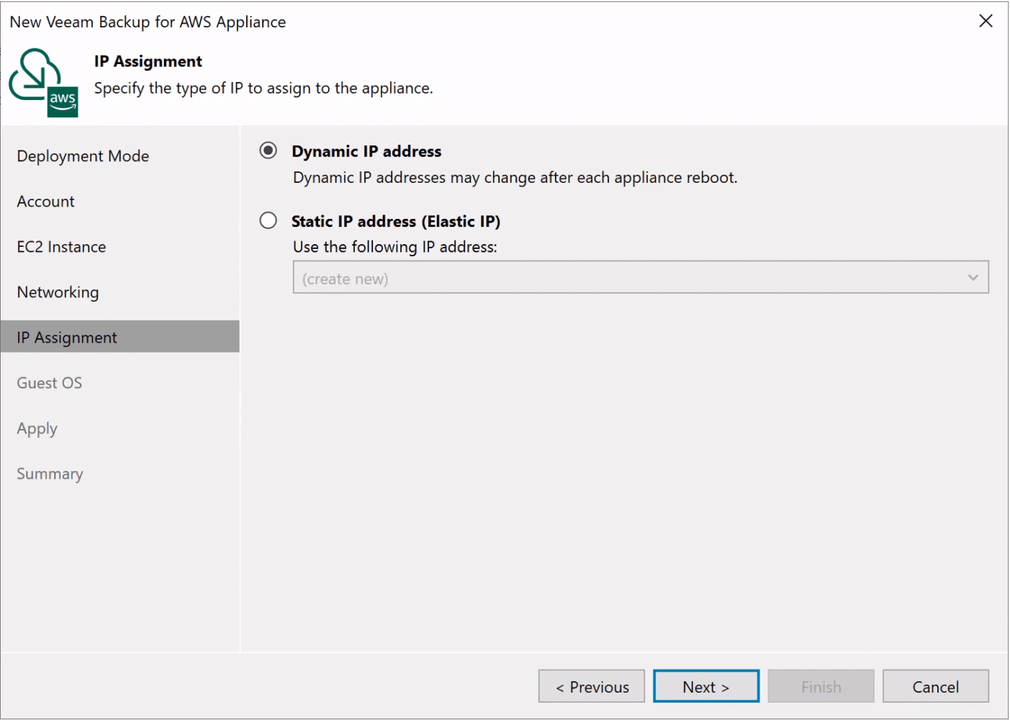
Next, set the IP information. If you have a direct connection between your Veeam server’s location and your GCP environment, set a static IP address here, otherwise leave it set to dynamic so the appliance can be assigned a public address.
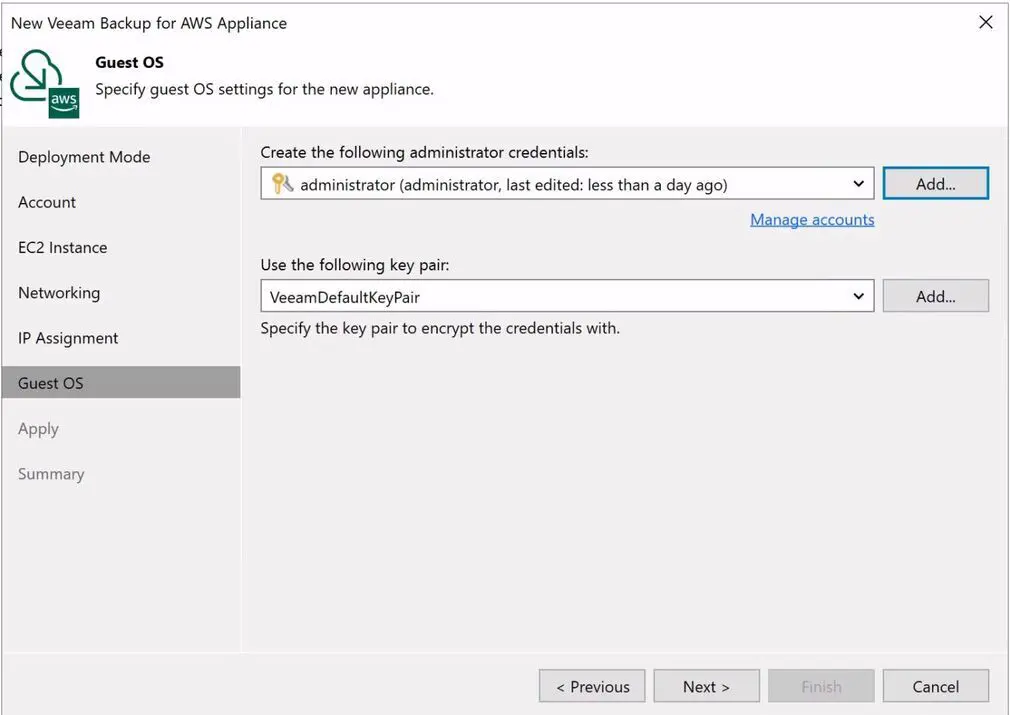
On the next screen, create or choose the administrator credentials and an encryption key pair you wish to use to log in to the appliance.
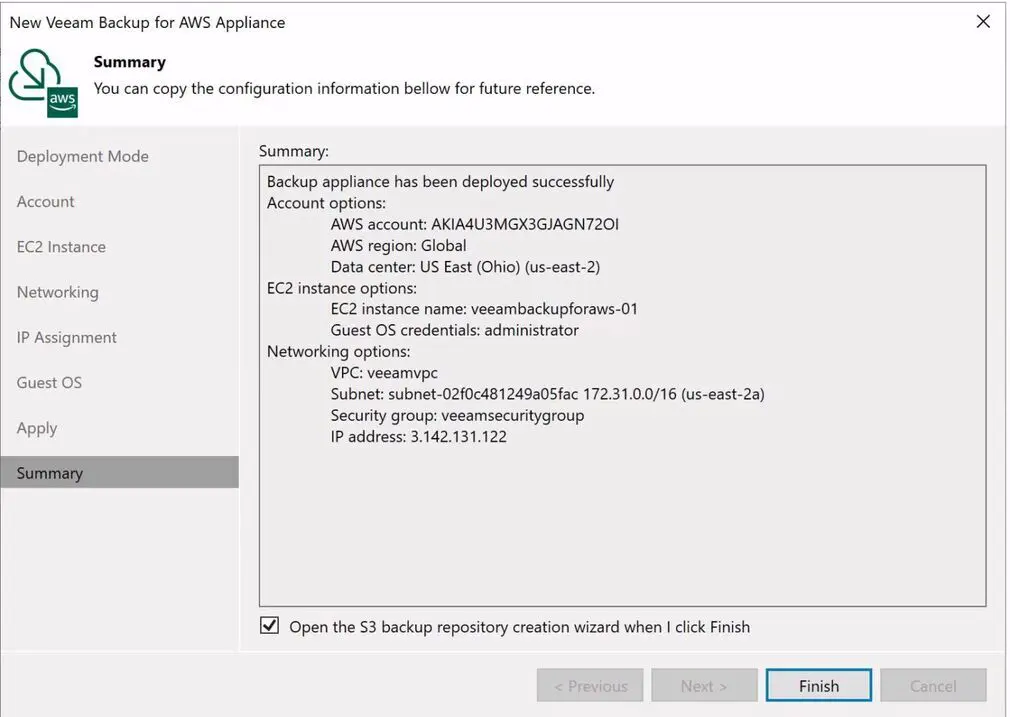
Apply the settings and wait for the appliance deployment to complete. This will take several minutes.
Click Next. Check the box to open the S3 repository creation wizard and click Finish.
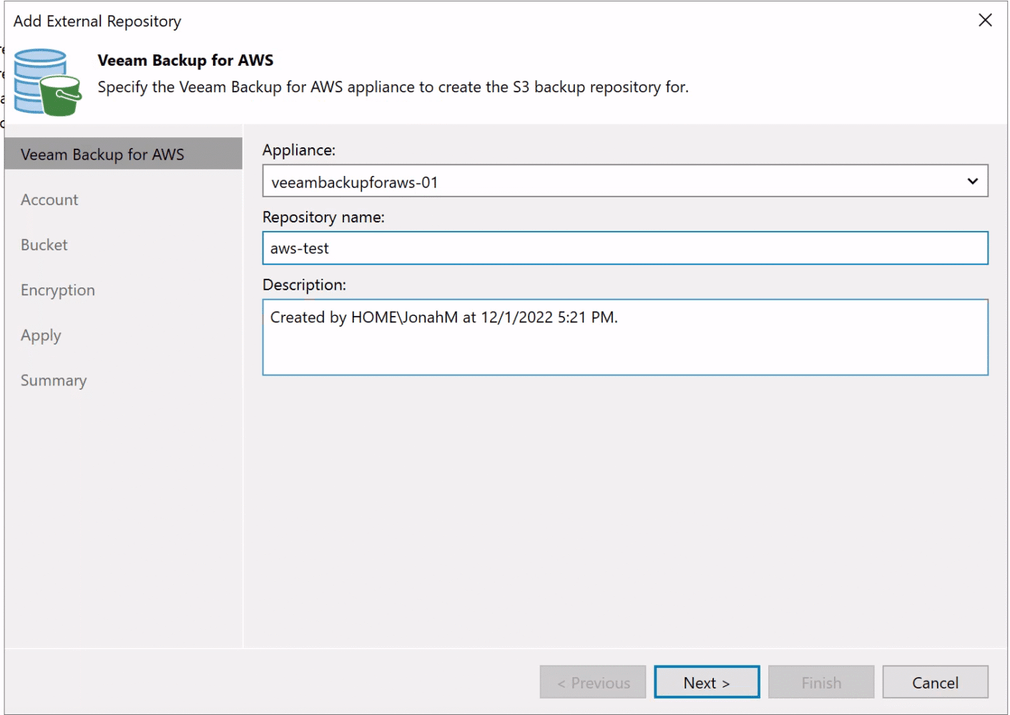
Now, select a repository name and set a description.
Select the correct region and enter the credentials that will be used for bucket access.

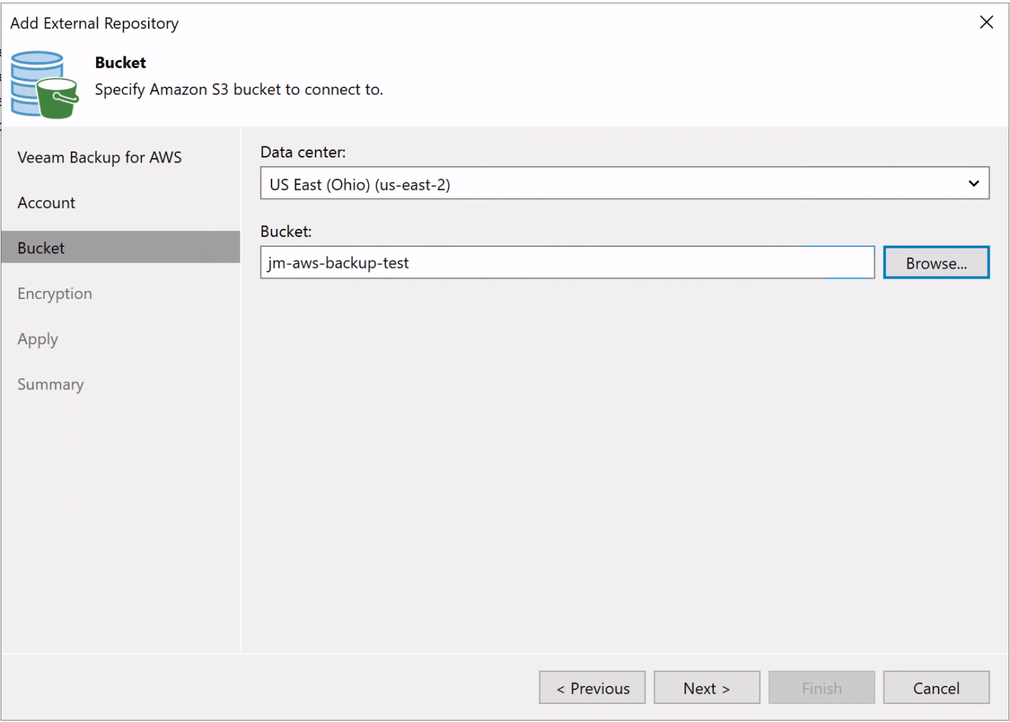
Next, select the data region and select or create a bucket.
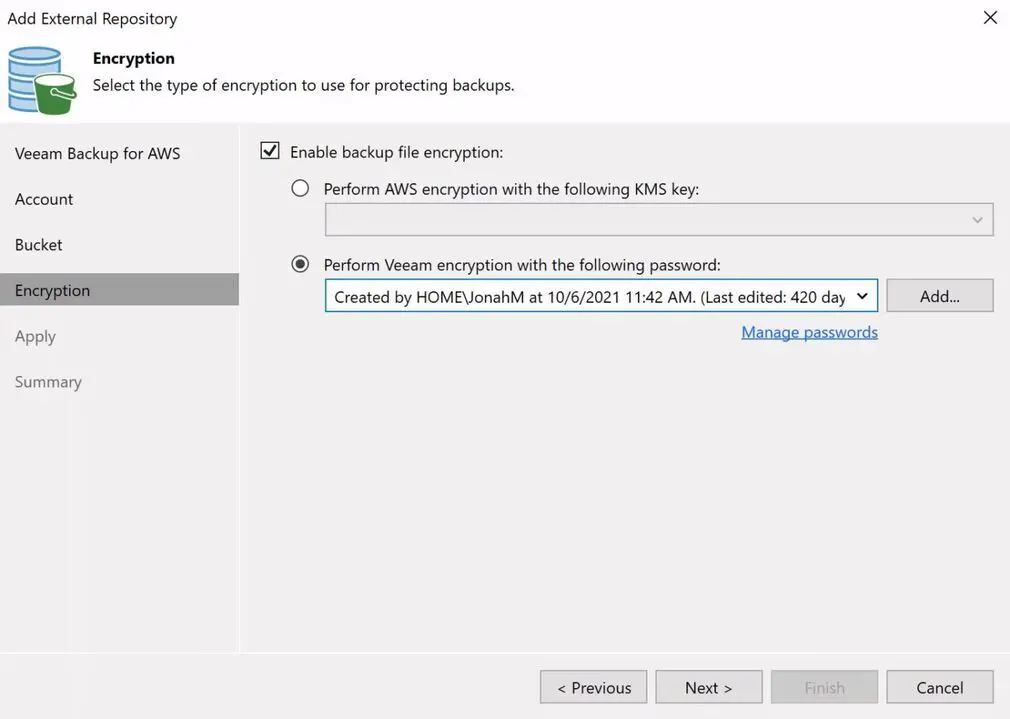
Next, set an encryption password for the bucket. This can be done with either AWS or Veeam encryption. After enabling encryption, apply the settings.
Before we can begin defining backup policies, we will also need to create at least one worker instance. To do this, we will need to launch the appliance’s web UI, which can be done under the Managed Servers menu.
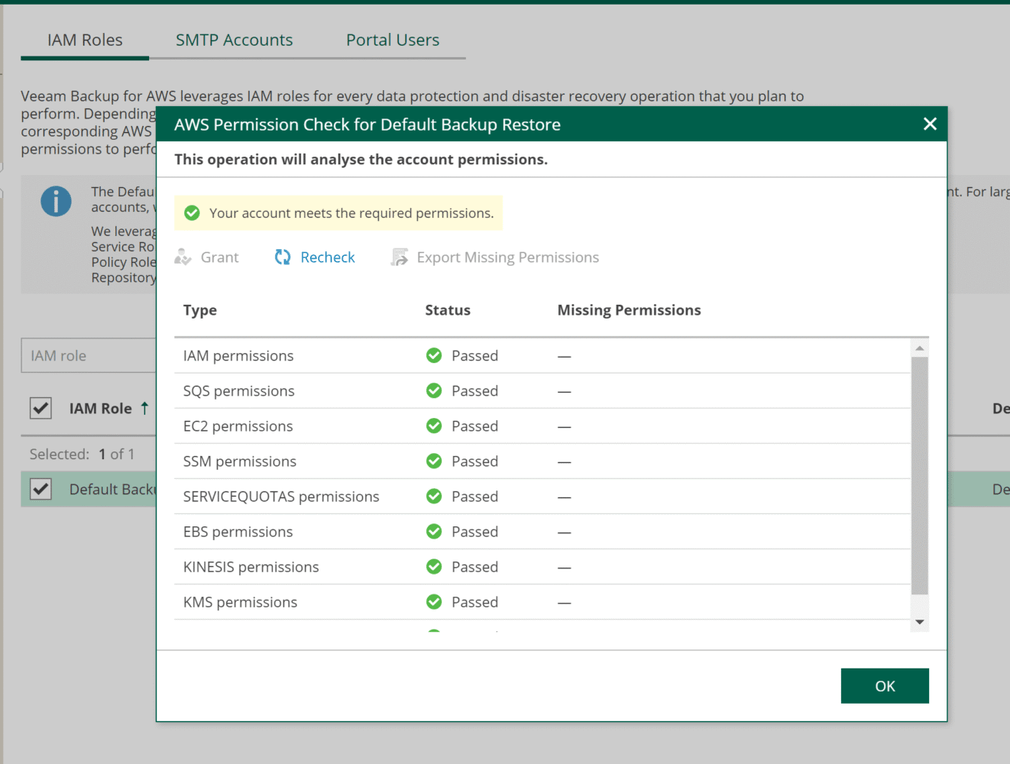
Click Configuration on the top right, then select Accounts and ensure that the default IAM role has the proper permissions.
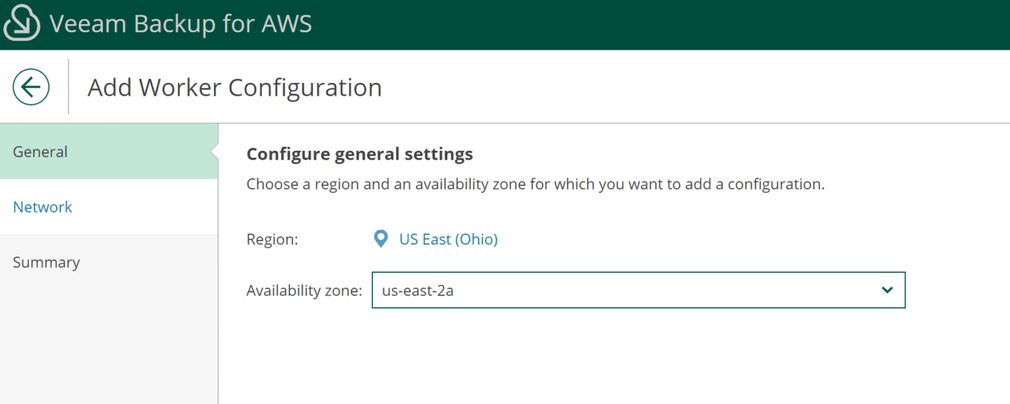
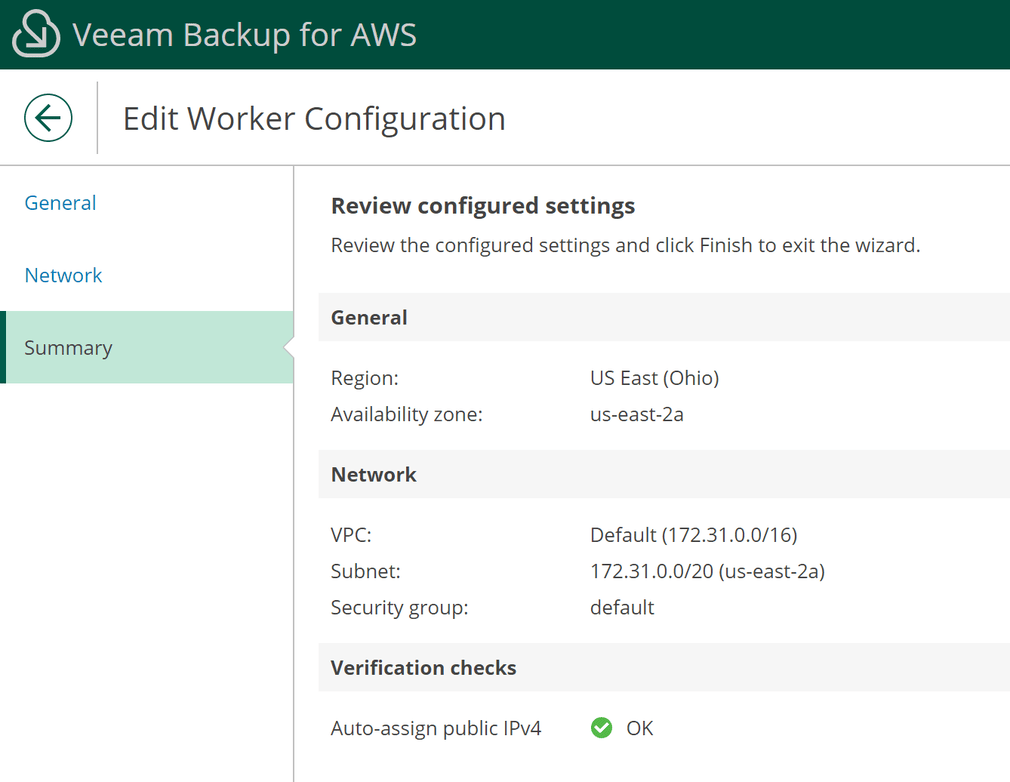
Next, select Workers from the left-hand menu. Use the Add button to begin worker creation. Specify the deployment region and availability zone.
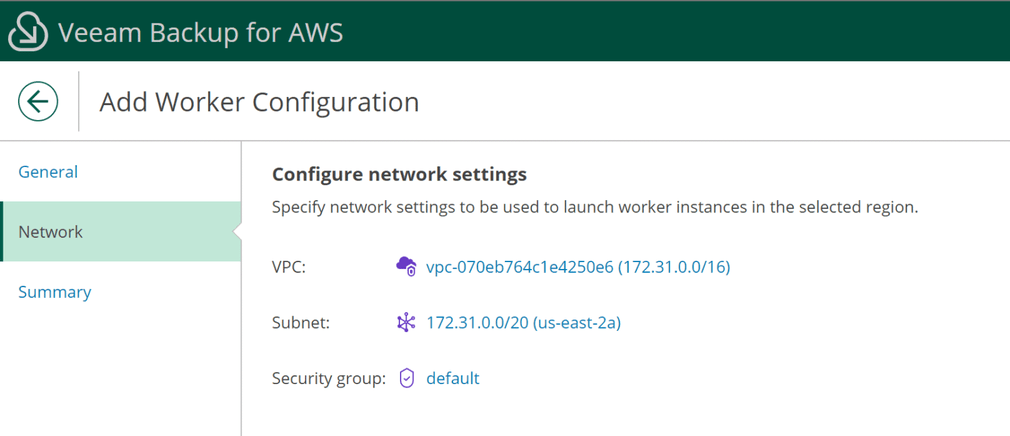
Next set the VPN network and subnet. Make sure to select a subnet and security group.
Confirm your settings, check for any warnings, and click Finish to save the worker configuration.
Backup Policy Configuration
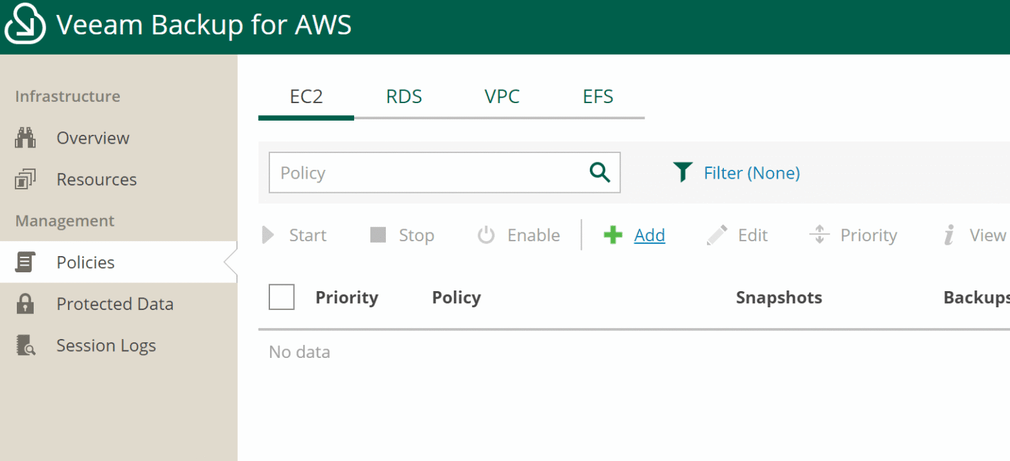
Now we are ready to begin configuring backup policies. Exit the appliance configuration and select Policies from the left-hand menu. Click Add to begin setting up the first backup policy.
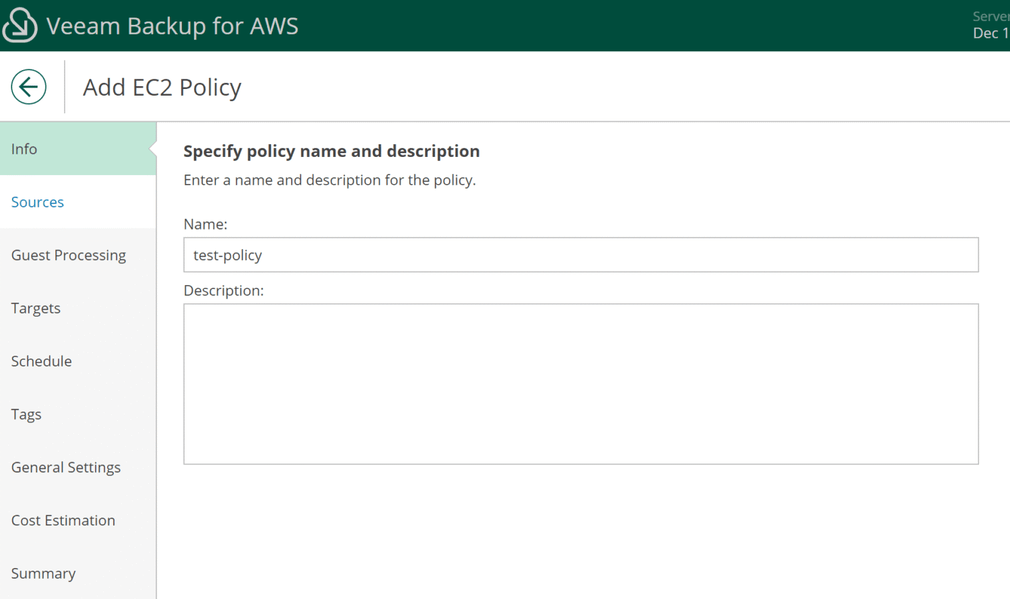
Start by giving the policy a name and description.
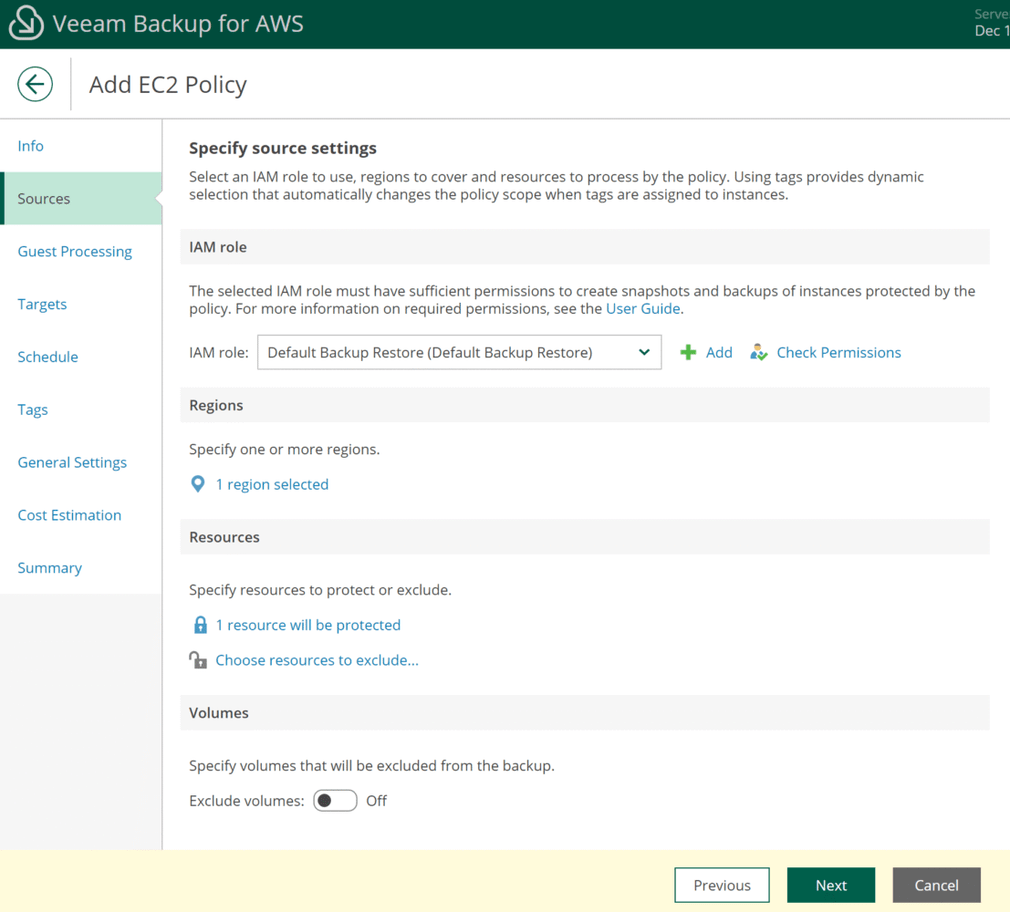
Now select the IAM role the policy should utilize and the regions it will be protecting. Finally, choose what resources the policy should protect.
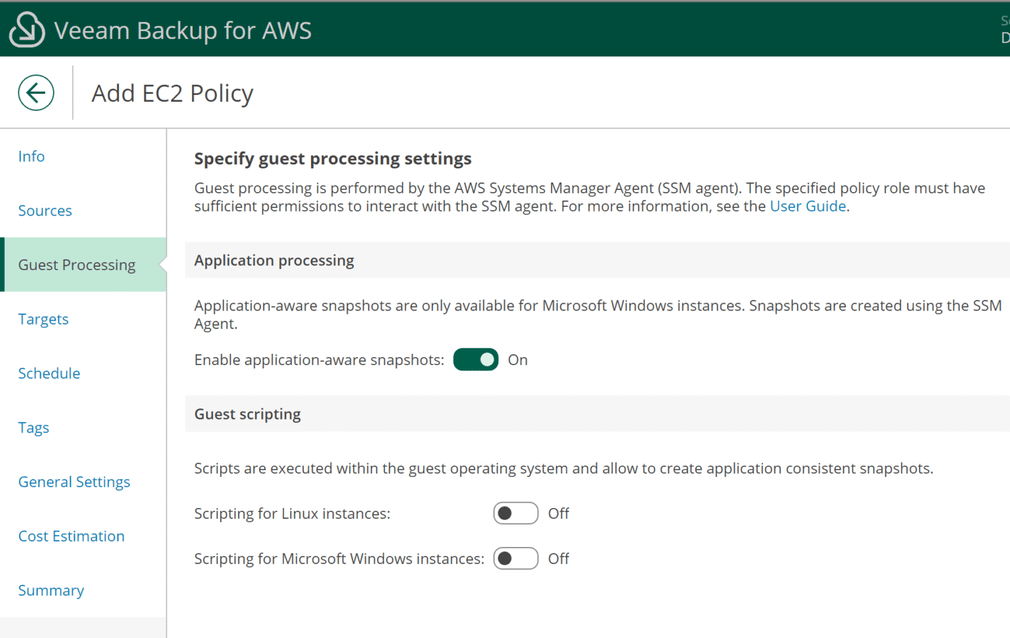
Enable application-aware processing and custom scripting if you would like to do so.
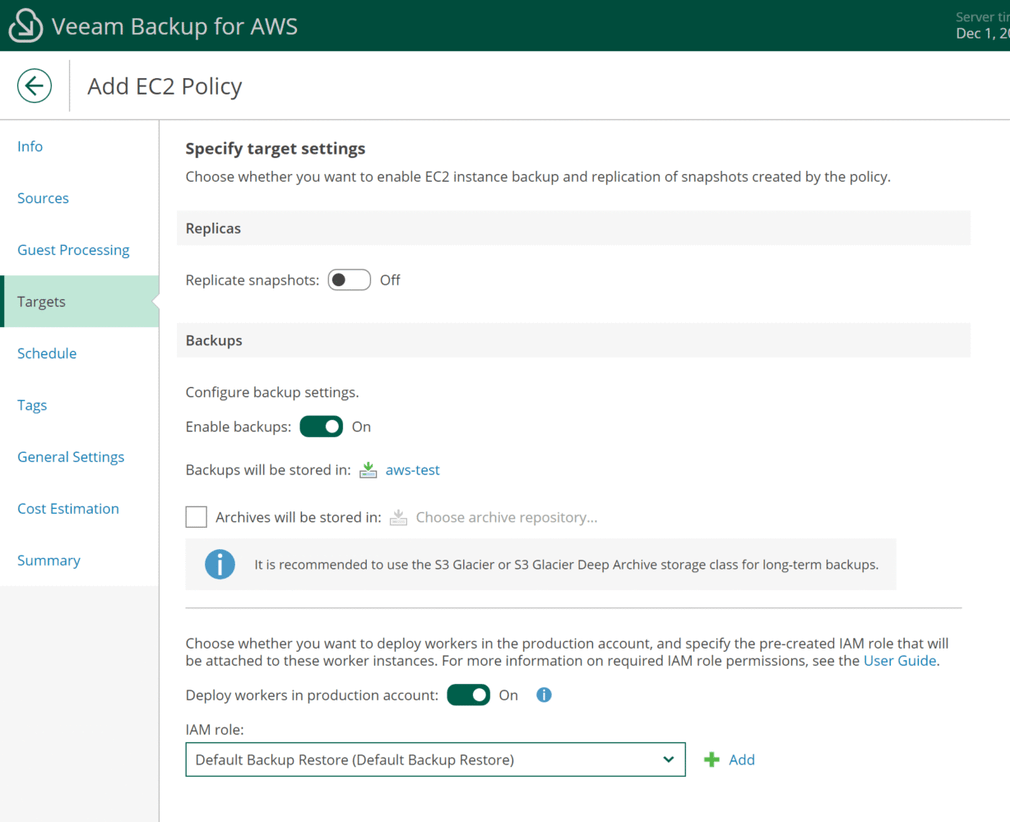
Enable backups and choose the repository created earlier. If you’d like to replicate snapshots to another region or deploy workers into the production account you can do so here.
Next retention is configured for backups and snapshots.
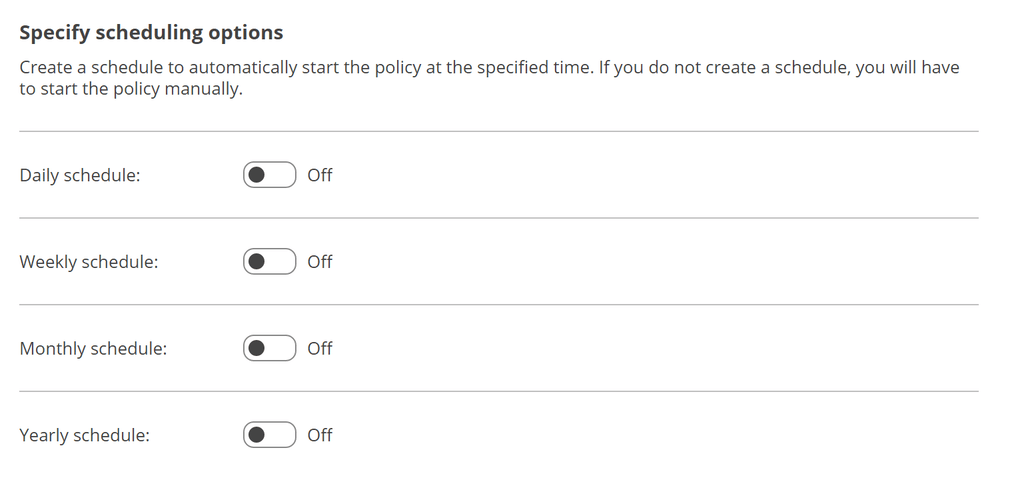
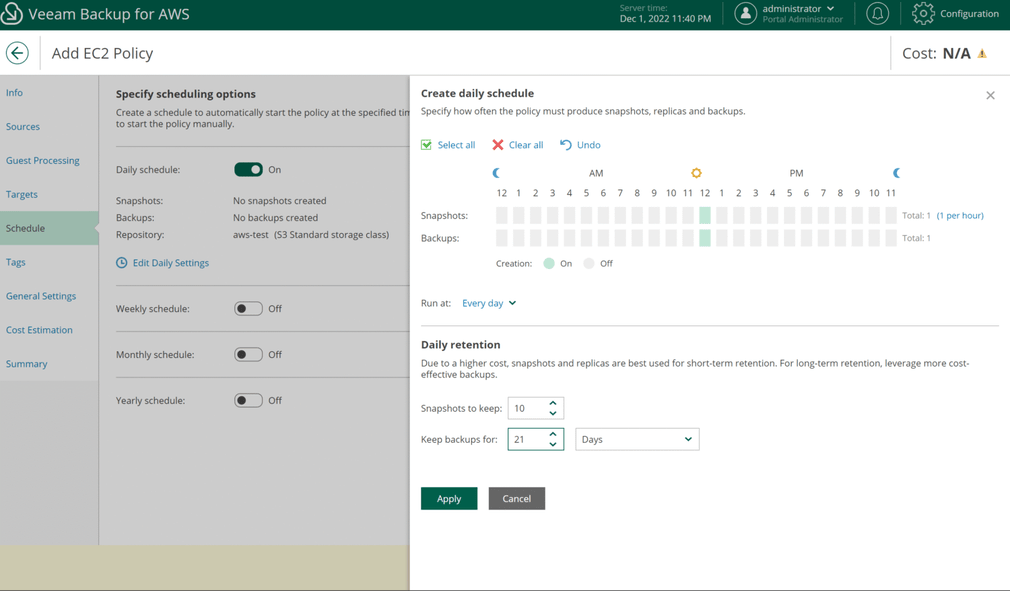
For each type of retention you wish to process, turn the retention on and edit the settings. Under the retention settings, you can set run schedules and retention periods.
After the policy schedule, you can set whether to save tags in the backups and whether to create custom tags on the resources.

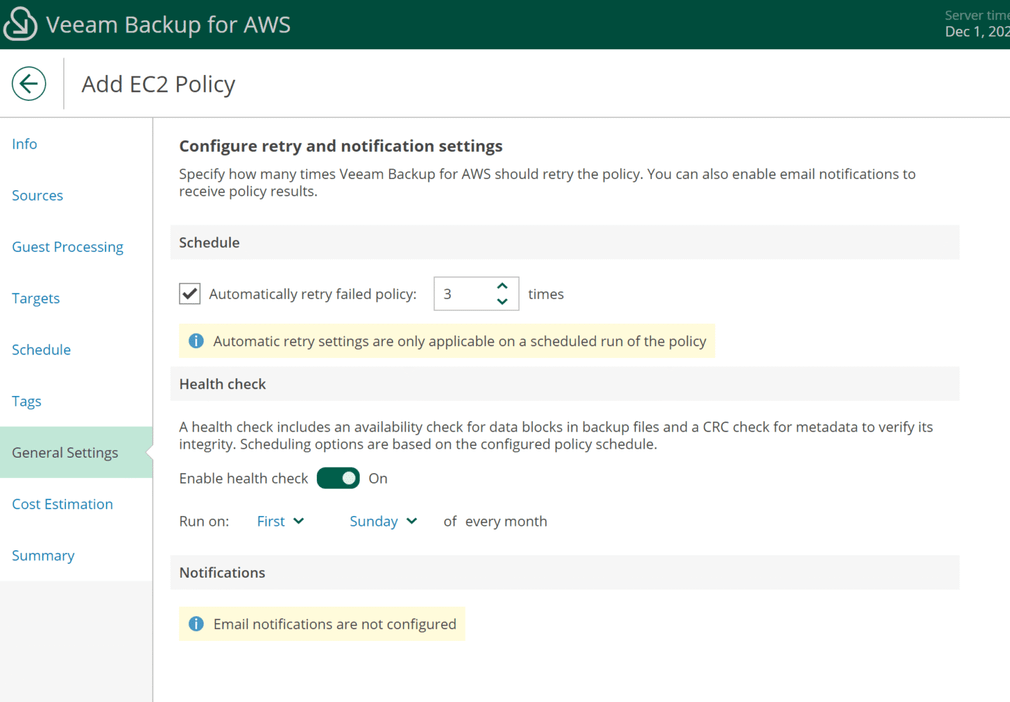
Next, you can configure retries, health checks, and email notifications for the policy.
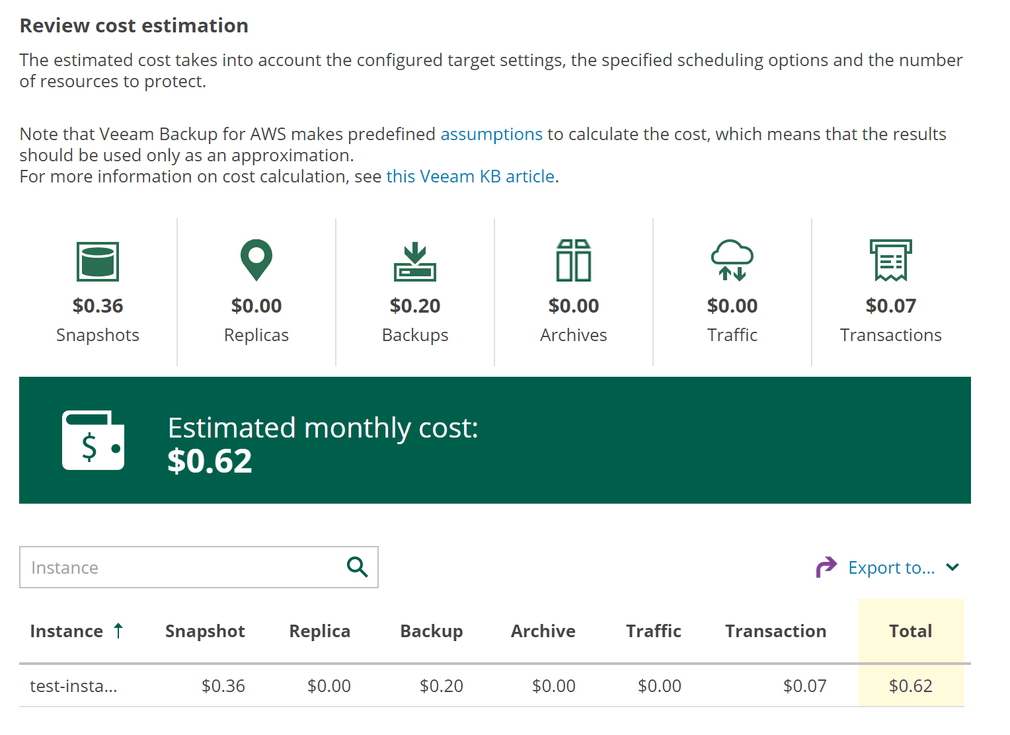
The final screens before saving the policy are a cost estimation and a summary screen. Click Finish to save the policy.
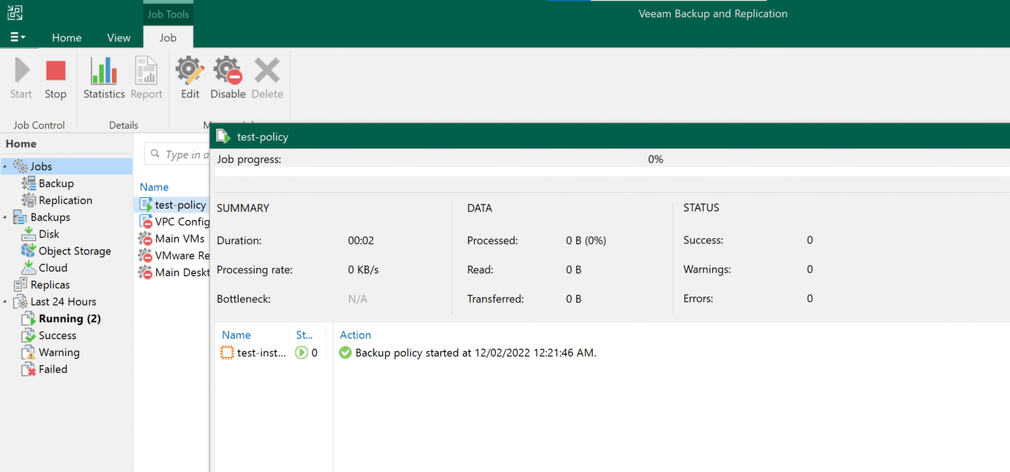
Back in the VBR console, you will now be able to see the backup policy under the Home screen’s Jobs menu. From the VBR console, you are able to start, stop, and disable the backup policy, as well as view session history.
Creating Backup Copy Jobs
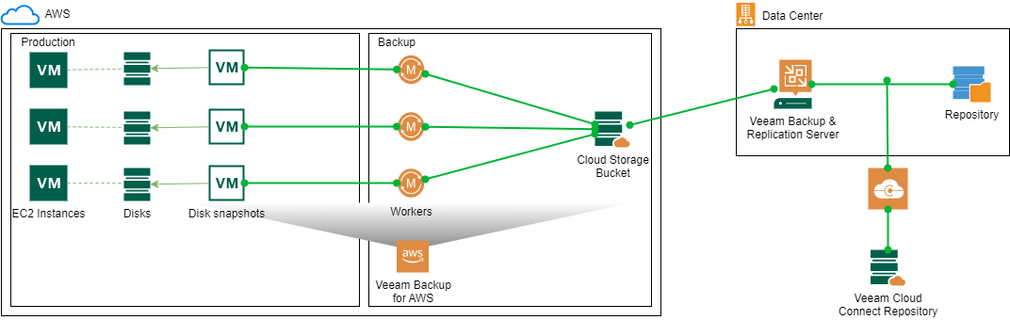
From the VBR console, you are also able to create backup copy jobs of AWS backup policies. These backup copy jobs can be configured to point to regular backup repositories and to Veeam Cloud Service Provider (VCSP) repositories, meaning your EC2 resources can be granted the same offsite protection as your on-premises workloads.
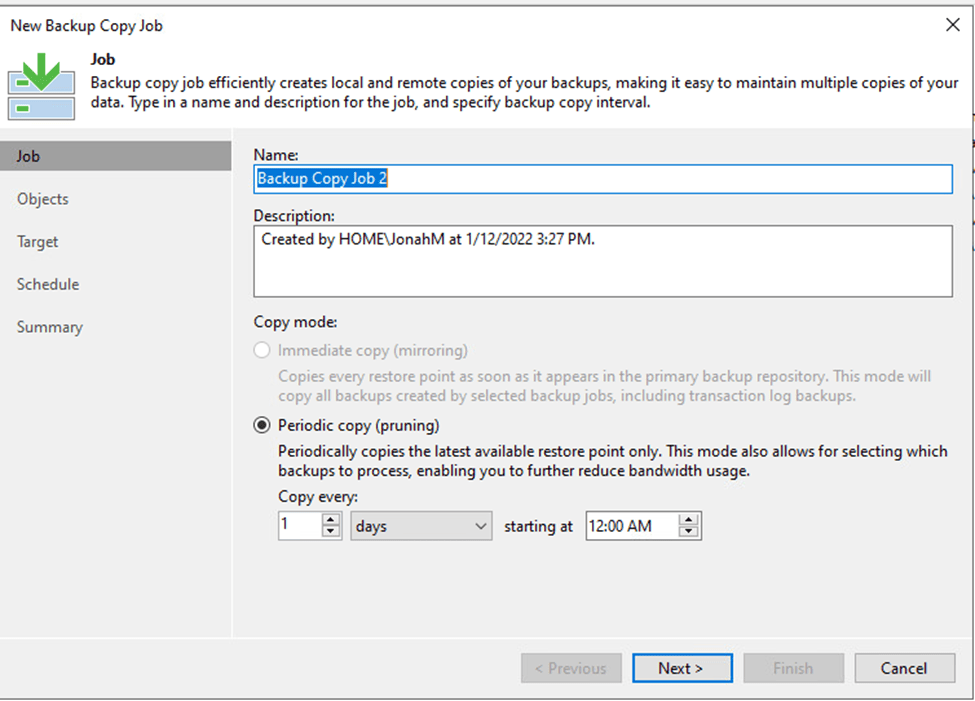
The process for configuring these backup copies is nearly identical to backup copies for virtual machines and agents. However, when creating a backup copy job, there is a new AWS EC2 backup option.

The only notable difference is that you can only select Periodic Copy (pruning) mode for the copy job.
Here is an example of an EC2 backup copy, pointed to one of Cyber Fortress’ Veeam Cloud Connect servers in their Las Vegas data center.
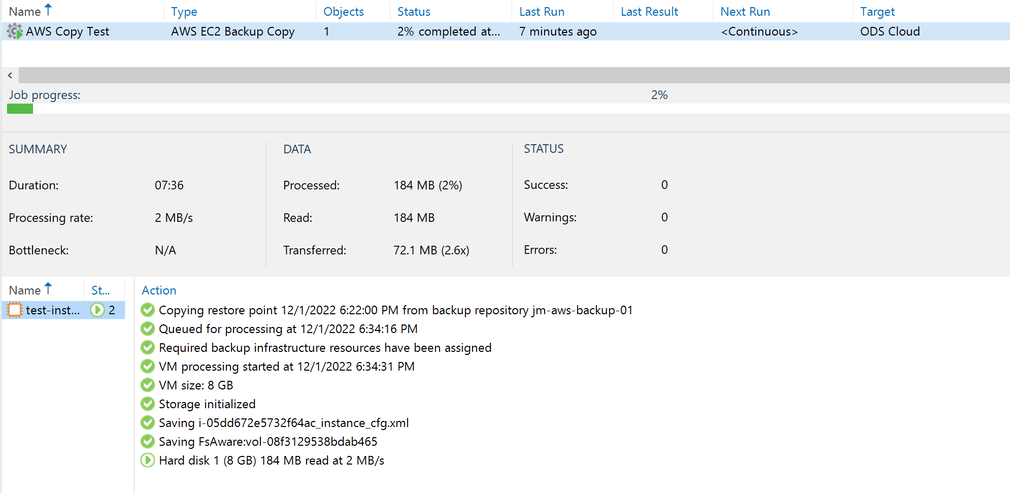
In an emergency, Cyber Fortress would be able to use this backup to restore my workload back to AWS or recover it to a hypervisor in their data center until restoring back to my AWS environment is possible.