Earlier in the spring, I began attempting to install and configure NSX-T and VMware Cloud Director in my lab but ran into some hiccups. Namely, my home router does not support VLANs and my lab (a Dell R720xd) is located in my guest room and is turned off every time family visits.
Now that I’ve returned from PTO and running a Boy Scout camp in Colorado, I decided to use this opportunity to rebuild my lab from the ground up in part so I can test some of the new functionality coming with Veeam Backup & Replication version 12.
After spending most of the 4th of July weekend tinkering, the lab is now nearly back up and running, with the following hardware. The servers and my router will be moving into the closet where the security and patch panel is located.
Storage:
1x Desktop – Ryzen 5 2600, 12 GB DDR4-3200 RAM, 10 GB SFP+, 1x 256 GB M.2 NVMe, 6x 6TB 7200 RPM HDDs
The RAM, NIC, and 4 of the HDDs were taken from the old lab or spare components I had lying around the house. This server runs Ubuntu 22.04 and Ceph Quincy, with pools set to replica x3, allowing for roughly 10.5 TB usable. The storage is presented to vSphere via NFS, as during testing I got much faster Veeam restores and VM IO than with iSCSI. Storage will also be presented via an object gateway for workloads that support S3-compatible storage.
While a 3 node minimum is recommended for a Ceph cluster, I decided to try a single node setup, since I’m not running production workloads on the cluster. Plus, I was curious to see how I/O would perform. Thanks to the rados bench command, I was able to establish the following benchmarks before any overheard for networking or access gateways:
- Write: 140 MB/s
- Random Read: 700 MB/s
- Sequential Read: 800 MB/s
Compute:
1x Desktop – Ryzen 5 5500, 64 GB DDR4-3200 RAM, 1x 256 GB M.2 NVMe
1x Desktop – Ryzen 5 5500, 64 GB DDR4-3200 RAM, 1x 1TB M.2 NVMe, Radeon RX 5600 XT
The first desktop was built completely from scratch, while the second is what used to be my physical gaming PC. The machine was virtualized and added to the cluster, its disks sitting on the NVMe rather than the Ceph cluster like the other VMs. The GPU is presented to the VM using PCIe Passthrough.
Restoration:
Before shutting down the old lab server, I made sure I had good offsite backups of all VMs. Since I was using the disks the old lab was built on in the new one, I couldn’t just vMotion VM files onto the new systems. Instead, I leveraged a Scale-Out Backup Repository with Copy Mode to write backups to Wasabi. While restoring everything, my bottleneck was the local network. Once blocks were downloaded from Wasabi and re-hydrated, Ceph uploads were just below 1 Gb.
Networking:
Knowing I now had network bottlenecks, I utilized the 10 Gb ports on my router paired with a multi-gig switch to increase throughput for the lab hosts. Giving the Ceph host 10 Gb networking and the ESXi hosts 2.5 Gb allowed me to increase restore speeds by about another 20%.
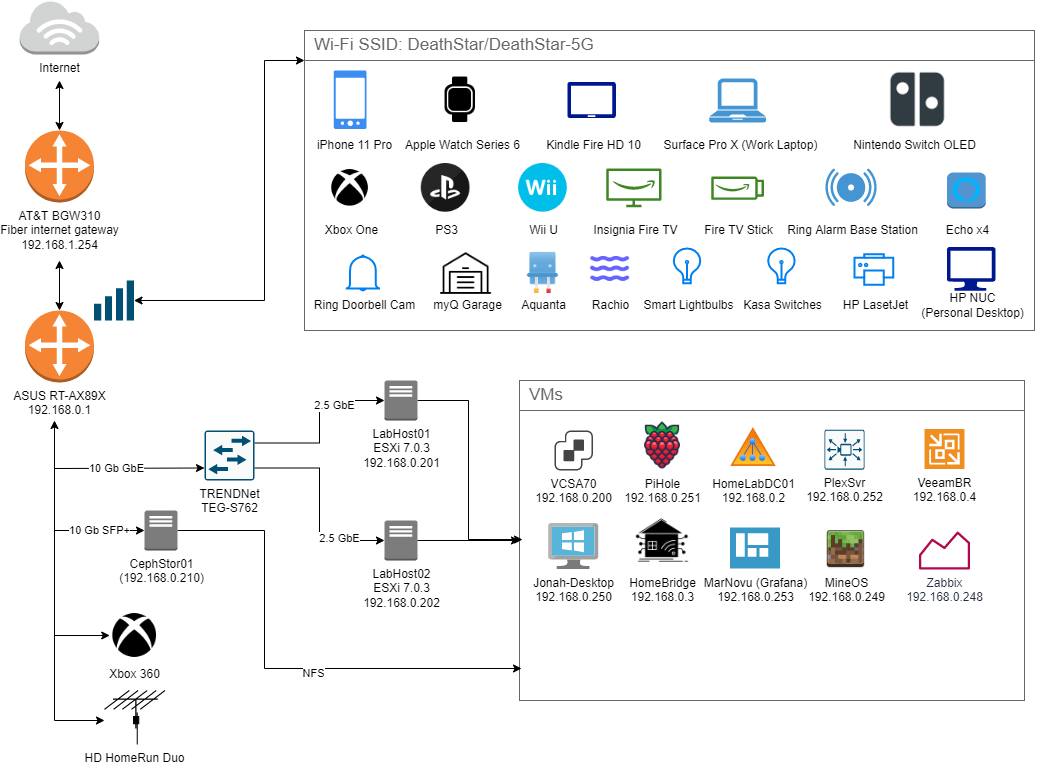
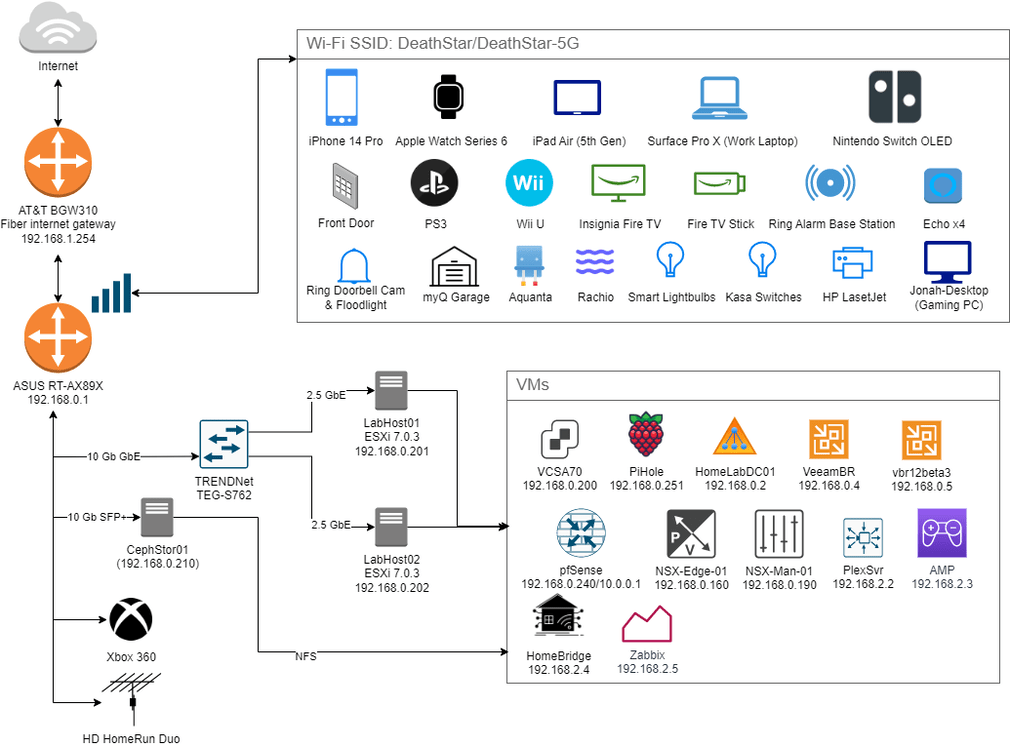
I also decided to use this opportunity to build a network diagram of the home and lab.
What’s Next:
My next task will be deploying a pfSense VM, allowing for a network on another VLAN to keep NSX-T happy for configuration. After that, VMware Cloud Director and VMware Tanzu will be deployed, followed by migrating several VMs to containers and re-IPing the remaining systems.